Monday, June 4, 2012

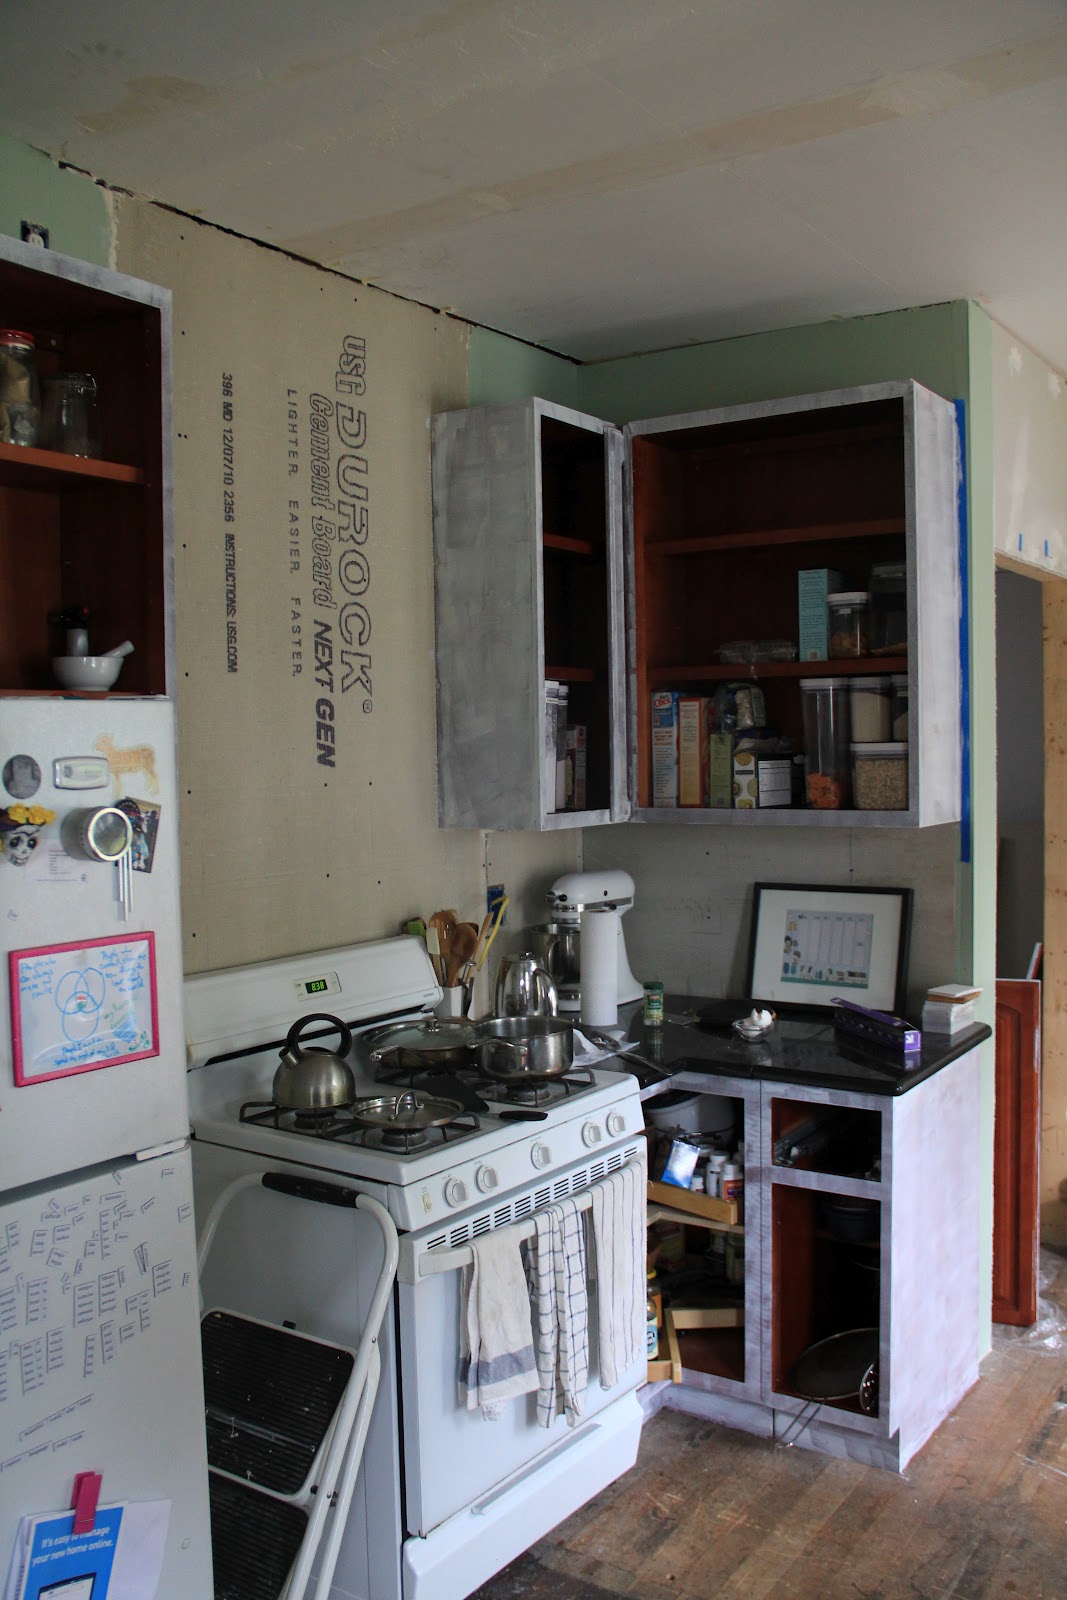
Kitchen Cabinets: Day 2-3

It was a long weekend but we are still well on track to having our kitchen cabinets painted and ready before our vacation.

Day 2 was the worst with all of the sanding and wiping. We were more than happy for day 3 to come around and to actually get some painting done!


We are back to living in a construction zone but I'm excited to see the transformation. So for Young House Love's tutorial is working great which is good since three days in and I already never want to do this again.

Cheers!

Friday, June 1, 2012

Kitchen Cabinets: Day 1

I'm on day one of the 14 day paint your kitchen cabinets plan (thank you Young House Love) and so far so good.

Doors off? Check.


Holes filled? Check. 

Now I get to contemplate hardware. I didn't hate the old stuff it just is a bit boring. Here's what I'm leaning towards.

Depression Green Glass Drawer Pull
via Signature Hardware

I'm so in love but not sure about the price. They are $8.95 a pop and with 16 handles it would be around $150 for all the hardware. It wouldn't be the biggest splurge but it would be the most unnecessary. Maybe I'll ask for them for my birthday. I'm not too old for that right?

In other news Norman's cousin Rumi is staying with us (that's my Mother-in-law's dog). They went on a road trip so he is spending the week with us. Surprisingly Norman gets along with him quite well.


How could you not love that face?

Here's to hoping days 2 and 3 go well. Tomorrow is sanding followed by priming. I can't wait to see what they look like white! Anyone else paint their cabinets before? I'm trying to follow everything to the letter since I never want to do this again. Tips are always welcome!

Cheers!


Thursday, May 31, 2012

Glamming up the Closet

I've done other jewelry organization posts (see here) but with the new closet slowly coming together I wanted to do something different. Should I have been working on the kitchen? Probably. But this seemed way more fun.

Here is the before (closet as kitchen):

and after:

 Looks more like a closet now right? Lets zoom in a bit.


I lined the edges with just simple cork for even more storage and then glued corks on the back wall (I probably should have done it on thin wood or cardboard for removability but I'll bite that bullet when I get to it). Closer?
 I painted the jewelry box last summer in Bher's Lipstick. I love the coral hue with the natural cork color. I also added some cute antique tea cups for corralling my bangles.

Though I do feel like I should disclose the true state of the closet.

Not quite there. Once the kitchen is done we will tackle the rest of the mess in here. There is one little bonus I also included.

With such a chic display I wanted more than just your average stick pin for hanging but I wasn't really willing to go out and buy anything nicer. So, I took my boring yellow sewing pins and a few of my favorite nail polishes and fixed them up.


Much better! Now these are ready to hang my pretties. All in all the project cost around $4.00 for the cork squares. Everything else was on hand. Now I can actually wear my jewelry which is a huge plus.

I've had in-laws here and Daniel has been traveling but things are still poking along in the kitchen. We've got 2 weeks until we go on our 3rd honeymoon (yay Jamaica!) so I've set myself a goal to have the kitchen cabinets painted before we go. Ambitious I know, but if Young House Love can do it in 14 days then I should be fine! (here's their method) Sometimes you just need a hard deadline to motivate right? Who wants to take bets on whether or not I finish in time?

Cheers!
 Linking up to
Frugal Friday
  Weekend Bloggy Reading

Friday, May 25, 2012

Cleaning Up Again

Sometimes it feels like I am constantly cleaning up. I guess that is just part of the renovation process. The kitchen is feeling more put together but the bedroom... not so much.


It's a good thing I've got the day off. My in-laws are coming next week so I've got no excuse to ignore it any longer. Nothing like company to spur on a project right?

On a happier note I finish my Couch to 5K training today and I am feeling great! So great Daniel, my mother, my friend Deanna and I are signed up for a half marathon in October. Yikes! Gotta find a new training plan to get ready for that one. Anyone out there finish a half marathon? How did you train? This will be my first.

Cheers!

Wednesday, May 23, 2012

A New Light

Our cabinet building did not go as planed this weekend. What happened? Let's just say I got Hangry.

HANGRY PILLOW decorative pillow hangry pillow Hunger and anger equals HANGRY eco friendly organic cotton cushion cover, pillow, 16", 41cms
via 


We did get one little kitchen project done. Say goodbye to that hideous boob light above the sink.

Before


After


I found this great pendant at our ReStore. It was too brassy to match with the other lights in the kitchen so it got a quick coat of ORB and we hung her up. I know, still no styled shelves. I'm waiting for paint before revealing the final look. More to come!

Cheers!

Thursday, May 17, 2012

Shelves at Last!

Finally after months and months of renovating we have shelves.


Lets look at the side by side again

May
January

I love it! The visual weight is off of the wall and all you see are windows (which need a coat of paint). We also hung the other cabinets we had from the original kitchen arrangement. Everyone found a new home and we are thrilled with the results. 

Remember way back how I hinted at how we saved 1,200$? Here's how. If you remember our original kitchen design (here) this is what the oven side of the kitchen should look like.

You can see in the bottom left corner there are plans for a corner cabinet with two small cabinets next to it. As I explained in this post last week there was no way I was going to shelve out (punny I know) that much money only to get rid of the perfectly good cabinets I already had. As I was scrolling through the shelving options seeing if I could make things cheaper I saw this


And what is a blind corner cabinet except a regular cabinet that you cant get in to the other door? This got my wheels turning and I realized, I have all the cabinets I need, I just have to be creative. So that corner went a little something like this. 

Cabinet A went up first. 


Notice the only one handle? Wait, it gets clearer. Now for cabinet B


Lets look closer.


See how the door is hidden behind the cabinet now? It creates the perfect gap to still open both but doesn't leave a huge opening like just removing the door would. 

We had one last cabinet to go up on the other side to complete the picture. 


The only cabinet we are missing is the base to the left of the stove. That should be a project for this weekend. Fingers crossed my next hair brained scheme works as well as this one. So far the blind corner doesn't bother me but we will see. It may be that we decide it is worth shelling out the big bucks to get something that works better but I am more than willing to go with the free option for now. 

What's next? I've got paint for the cabinets and once that last shelf is built counter tops need to be addressed but the sun has been shining so who knows how far we will get. You've got to enjoy the sun while you can in Seattle. 

Cheers!

Linking up to Frugal Friday

Weekend Bloggy Reading

Wednesday, May 16, 2012

Painted Lady

That's right folks, What used to be a gaping hole of sadness is now all gussied up and ready for some shelves.

Let's give it a before (as in way before)


During

After


Can you say open and fabulous? The bottom picture is the most true to color. We were a bit worried about it when we started but once I saw it with the white trim I knew it was perfect.

Now we are ready for some shelves! I finally feel like the kitchen is coming together. Bit by bit.

Cheers!