Showing posts with label Before and After. Show all posts

Tuesday, October 7, 2014

Front Yard- Before and After

Apparently even professionals can't stick to a deadline. By Friday it was clear they weren't going to finish and after a long day yesterday the yard is 90% complete. The plant order was short so there are a few things still to come, but here is the general picture.

Let's look at the side by side comparison. 

Looking up from the front stairs before:


Now


Looking toward the street


The view from the porch


As you can see it is a million times better. All it needs is a few little tweaks and I can finally call the front yard done! I say it was 100% worth it to pay someone to just get the job done. The whole project was so quick and clean, nothing like it would have been if I did it. Could I have gotten the same results with half the budget? Probably. But it would have taken me months of blood, sweat, and tears. I'll take you around and show you all of the plantings once we are officially done later this week. Maybe I can score some end of the season deals on furniture for out there.

Cheers!


Monday, September 29, 2014

Front Yard Renovation: Day 1

It is amazing what a two man team, working eight hours can do to a space.


This is what our yard looked like this morning:


And this is what it looked like by 4pm:


I can already see the potential.  Be back Saturday with the final reveal!

Cheers!

Tuesday, August 6, 2013

DIY Sparkly Shoes: Take 2

Two years ago (almost to the day) I made these sparkly shoes. What I didn't tell you is that they ended up being a complete and utter fail.


After one wear the paint and glitter started peeling off. No good. But my love for sparkly things persists so when this tutorial came around I gave it another go.

I started off with a pair of Tom like shoes from Lands End. I loved the idea of them, but the light color just wasn't practical.


I grabbed some gold fabric paint, gold glitter, and fabric Mod Podge and went at it. In the end I sprinkled even more glitter over the glittery paint just for the fun of it and then sealed it all in with MP. I let the whole thing cure in the sun and gave them a walk about.


Good as gold.

What was different this time? I think the fabric paint adhered to the fabric shoes better than the acrylic to the faux leather. Only time will tell but I've worn them on two long-ish city walks and no peeling or chipping. I'm calling it a success!

Glittered anything lately? Nothing is safe I tell you.

Cheers!


Wednesday, July 17, 2013

Dining Alfresco

One of my TBC's that I really wanted to finish was my little bistro area in the back yard.  The original footprint was just a little too small.

September 2011

You could only get two chairs out there and they were always being shoved on to the grass. This year I took the opportunity to move out all of the rocks and put down weed blocker. It took forever but finally we have a useable patio. We've had the chair set forever. I think Costco still carries them though.


My mint went crazy this year!

I love sitting out under the lights and enjoying the evening.


You have to enjoy Seattle summers while they last.

Cheers!

Wednesday, July 10, 2013

Holes? We Don't Need No Stinkin' Holes!

And neither do my ceilings!

Exhibit A:


Exhibit B:


Now that they are off my TBC list I am that much closer to starting a new project! I have to say this has been the best and worst thing ever. I know exactly what needs to be done but I don't always want to do them. However, it is holding me more accountable than anything else ever has. I am itching to start a few projects I have lined up so I have been pushing hard on getting things done.

How well do you hold yourself accountable? I'm terrible (in all aspects of life not just house projects) but I am working on it.

Cheers!

Thursday, June 6, 2013

Compl....ete?

I have for you an almost complete bathroom before and after. Why isn't it complete? Time is a tough mistress.  Still, it is worth taking a peak.

Before


So Far


We didn't move much plumbing (the sink skooched over about a foot) so the shower and toilet are in the exact same spots. I think it helps highlight just how much we changed things.


Obviously paint needs to happen and trim but otherwise things are done. I am so happy to be finished with this project! This is my favorite project so far. I think mostly because of just how much we changed (for the better!). It is really easy to look back and see how worth it it was. I love before and after photos don't you?

Why the sort-of reveal? Daniel and I are off to La Paz, Mexico for a family reunion this week. As you read this I am winging over CA on my way to sun and sea so things might be a little quiet around the blog this month. I've got a few little posts lined up but we will be back and wrapping up the bathroom in July.

Cheers! 

Thursday, May 9, 2013

Year Two- Recap

Today is our two-year house anniversary! It seems like we've been here so much longer than that (in a good way) and I think we've made some real progress.

Here's what we accomplished in our second year of home ownership:

We went on our 3rd honeymoon to Jamaica, which spawned this cover up and this craft. 
We spent most of the year getting our kitchen done. 
Added bookshelves to the livingroom


Went to Paris

Added house numbers (you know, so people can find the place.)

 Discovered just how cute our house is with the removal of some trees. 

Finally got a headboard

Finished the master closet

Started remodeling the downstairs bathroom

As well as a slew of little projects along the way. It has been a quieter year (that kitchen knocked me out!) but we are moving right along!

Tonight we will be celebrating with delivered pizza, wine, and camping out in the living room in honor of our first night in the house. Always a fun time!

Do you mark important dates with food? How long did you manage to celebrate minor (but major to you) moments in your life? I love remembering the little fun things each year.

Cheers!


Thursday, May 2, 2013

Tumbling Down

So a few months ago my mother was visiting and we were sitting around chatting when we heard a CRASH coming from the kitchen. 

The aftermath. 

My beautiful floating shelves apparently got fed up with carrying all of my cook books and did a nose dive. Boo!

We still aren't sure what to do with the space in the long term. Do we dare to do shelves again? For now, I shopped the house and pulled this little corner together.


It definitely holds all of the cook books (and a few other important items). I'm not loving the color it is in here so if it stays it will probably get a coat or two of paint.

I propped up our monthly calender (which I just realized needs to be changed to May) added my pompom flowers, piggy bank, and that cute bug tray for a key catch all.

Don't you love it? Cost plus is selling them right now for $1.99. I got all three styles but this one is my favorite.

What do you think? Is this a keeper? Or did you like the floating shelf better? Daniel want's the shelves back but I am skeptical we can make it work better this time. 

Cheers! 

Friday, March 22, 2013

Just Hanging Around

The downstairs project has displaced a great many things. That and my collection of free or almost free projects I just haven't gotten around to is starting to pile up hoarders style. I've basically decided to Craigslist it all so hopefully it will be clutter free soon.


I don't always clean my house  but when I do, it's after watching hoarders
via


One thing I didn't want to part with though was my wall of frames. So, I relocated it.

What once was an empty hall

now is filled with memories!


I wanted to play with the arrangement a little and when I found this pin a while back I thought I'd give it a try.

I like the way the center line anchors the different sized frames. It was hard to get strait and even (think lots and lots of holes) but in the end it worked out. Now the hall has a little pizzaz don't you think? Especially compared to its pre-picture plainness.

I didn't quite use all of the pictures but I'm sure I'll find homes for the rest!

Cheers!

Linked to:
 Weekend Bloggy Reading
The Shabby Nest

Thursday, January 17, 2013

DIY House Numbers

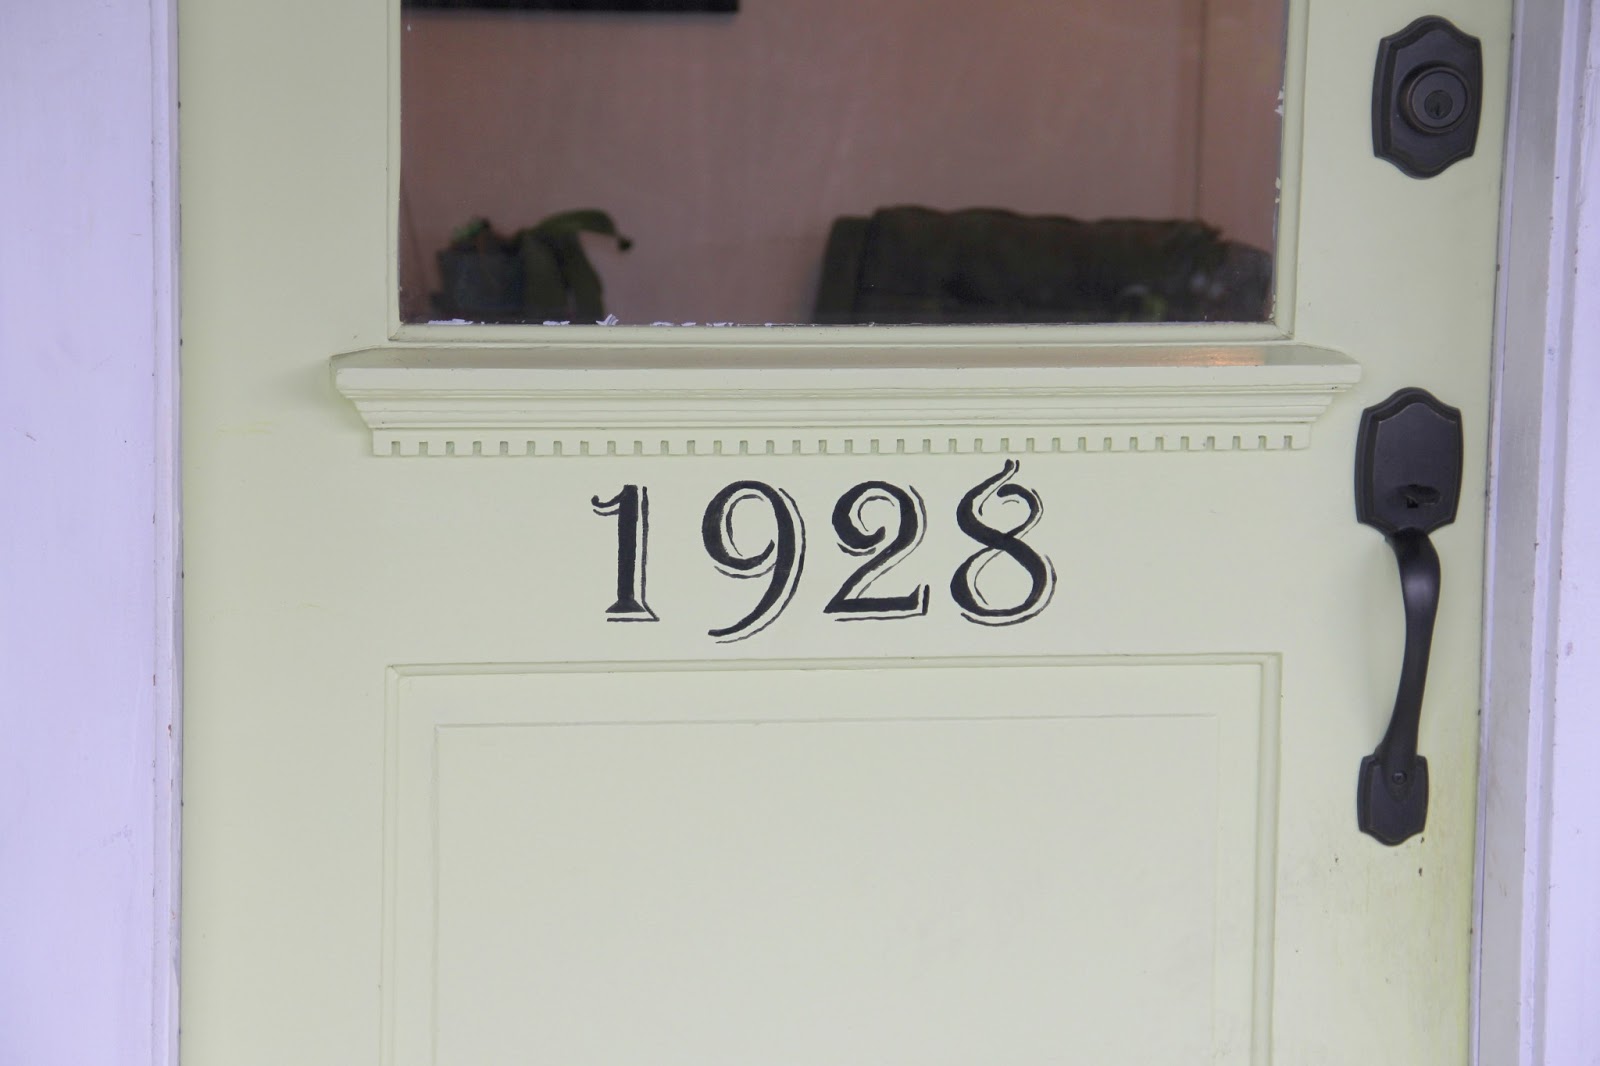
I pinned this post about lettering wood months ago with no purpose in mind. So it sat there. Waiting for some inspiration. Then I got it! We need numbers on our front door! Ta-Da!


Before our recent tree removal finding the house was a bit of a pain. You could never really tell what the address was with all of the trees obscuring the view from the street. Now that it is open, I wanted to change that.

Jamie's tutorial was super easy to follow. Just print out what you want to letter and tape it to whatever you want.


I used Algerian font type at 400pts. The tracing was actually the hardest part. My door was not soft, nor smooth so my pencil skipped all over the place. Don't worry though, it is mostly a guide line of sorts. The whole project probably took me 2-3 hours and two coats of black paint.


Not the smoothest but I still like the over all look of the hand lettering.

Here's the door, unadorned.


And adorned.


The only downside? If I want to change the door color I'll have to repaint my numbers. Here's to hoping I don't get tired of my door any time soon.

Anyone else try there hand at hand lettering? Michelle over at Decor and the Dog made a super neat sign/ resolution reminder which I love!

Cheers!

Monday, November 5, 2012

Bedroom Progress

We started this weekend with all sorts of plans to finish up a few projects we have been working on around here but in grand Keller fashion we decided to go to Ikea instead and start a new project that wasn't even on our radar. I know, crazy. Of course, since we decided this Saturday night I'm still putting the finishing touches on things so I thought I'd show you something we did ages ago.

Remember when we were rushing to get things done for our house inspection way back? Well part of that was giving it a paint job. That's right, I've been sitting on a Before and After for months. Bear with me folks.

Here's the bedroom right after we cleaned everything out back in July.


You can see our finished corner that we bumped out in the kitchen processes giving us a nice square room instead of a silly L-shaped one.
 My mustard dresser really clashed with those lavender walls.

Obviously we needed to paint to make it look less half done so we tried something new. Since time was of the essence we decided we would just go to the store, pick paint, and then come home and paint. No swatches, no thinking, just go with our gut instinct.

Here's how it turned out.

We ended up going with Behr's Slate Green. Which is surprisingly not very green.

I also finally splurged and got a full length mirror. Can you believe I've gone a year and half without one? I've been so happy to be able to see my see my shoes and shirt at the same time (silly I know, but it is the little things)

I'm not sure if the light is staying. It actually doesn't clash as much as I thought it would but I am still on the fence (Daniel loves it so it may take an act of God to change it).

Daniel's side of the bed.

My side of the bed. As you can see I get the dog. I've got ideas for how to hide the dog bed though. I'll keep you updated if I ever get around to it.

 You can see we have the trim up but I need to put one more coat of paint on it. I also need to paint those doors.

There you have it, a long over due reveal. Has anyone else just picked random colors and gone with it? So far it is working out for us.