The less space you have the more crafty you need to be. Our Library is ridiculously small so when I stumbled on this pin I knew I had to try it.
I had some scrap 1X5 boards lying around from door frames so I used what I had. The whole project is super simple. Cut three boards the same length. Nail them together and there you have it. I spray painted mine a navy blue to tie in the pillows.
You could easily do something bright and fun or just stain it if you prefer the more rustic look.
Simple and easy and mostly free. My kind of project. We've used the cuff a few weeks now and it is very sturdy. Norman can even jump up on the couch and nothing happens (which happens often). Now it makes me want to re-upholster the couch (funny how that happens right?)
Cheers!
Showing posts with label Tutorial. Show all posts
Tuesday, July 2, 2013
Wednesday, June 5, 2013
Hook, Line, and Sinker
Oh how I wish we had a dedicated mud room. Alas, when our house was built way back in 1902, these things weren't necessary. Maybe husbands put their coats away in the closet every time back then? Who knows. People do always say life was so much simpler in the good old days. While I don't have a mud room, I do have a wall.
A wall with hooks.
Simple, easy, effective.
A wall with hooks.
Simple, easy, effective.
I got my inspiration from here. The rest was just left over 1x5, hooks and paint. Super easy and only as expensive as your hooks (mine are from Home Depot).
Now if I can just convince someone to hang up their coats...
Anyone else lacking in a mudroom? How do you corral your coats? We don't even have a coat closet (the shame!)
Cheers!
Thursday, May 23, 2013
Grouting- The Final Frontier
This week I tackled grouting our bathroom floor. Not going to lie, I was scared. Really scared. But I pushed through and it all worked out in the end. Here are a few tips.
1. Take the time to make sure any mortar that pushed up through the grout lines is removed. This takes forever but it is worth it.
2. Work in small batches. I did 2 cups of grout mix at a time. which was about 1/4 of our 42 sq/ft bathroom floor.
3. Be prepared. Get everything ready and have extras. Extra gloves, water, etc.
4. It's going to be messy, and that's ok.
This was the scary part. I had my beautiful clean tile and then I dumped grout on it. (below you can see all three phases. Clean in the upper left, hazy in the upper right and freshly dumped grout on the bottom)
And then I freaked out.
Yeah. Not very pretty. But keep going. Just like the instructions say (I liked this series of tutorials btw) keep working that grout in to the grout lines and scraping away. It looks like a mess but it will clean up. I promise.
5. Walk away. This was the hardest but, because I was working on the floor, I couldn't grout the whole thing at once if I had any hope of getting back in there to clean up. So I put my 2 cups worth of grout down, spread it around and then walked away for 15 min. That gave the grout time to set enough that I could form my grout lines (for a good explanation of this you can watch the video) and clean up. It still wasn't pretty but don't worry.
The first day I did half the floor, cleaned as much of the grout off the surface of the tiles as possible with my sponge (there was still a back haze) and then went to bed. When I woke up in the morning I used a damp sponge to clean off the last bit of haze. If you don't wait for things to dry a bit you just pull up the grout from where you want it and spread it around the top of the tiles. No good.
So pretty right?
It took two days but only about 3 hours of actual labor. Lots of waiting. Don't rush it. I still think it is scary (how on earth will I manage a vertical surface- the grout is like pudding!?!?) but at least now I know it can be done. We are tackling the shower this weekend so I'll let you know how it goes!
Anyone else have grouting tips? This was my first experience with mixing my own grout and it is a lot more liquid than the pre-mixed stuff. Good for the floor but I'm curious to see how it works on the walls.
Cheers!
Materials
Tile- Black and White Basket Weave from The Tile Shop
Grout- Un-sanded grout from Home Depot in Charcoal
1. Take the time to make sure any mortar that pushed up through the grout lines is removed. This takes forever but it is worth it.
2. Work in small batches. I did 2 cups of grout mix at a time. which was about 1/4 of our 42 sq/ft bathroom floor.
3. Be prepared. Get everything ready and have extras. Extra gloves, water, etc.
4. It's going to be messy, and that's ok.
This was the scary part. I had my beautiful clean tile and then I dumped grout on it. (below you can see all three phases. Clean in the upper left, hazy in the upper right and freshly dumped grout on the bottom)
And then I freaked out.
Yeah. Not very pretty. But keep going. Just like the instructions say (I liked this series of tutorials btw) keep working that grout in to the grout lines and scraping away. It looks like a mess but it will clean up. I promise.
5. Walk away. This was the hardest but, because I was working on the floor, I couldn't grout the whole thing at once if I had any hope of getting back in there to clean up. So I put my 2 cups worth of grout down, spread it around and then walked away for 15 min. That gave the grout time to set enough that I could form my grout lines (for a good explanation of this you can watch the video) and clean up. It still wasn't pretty but don't worry.
The first day I did half the floor, cleaned as much of the grout off the surface of the tiles as possible with my sponge (there was still a back haze) and then went to bed. When I woke up in the morning I used a damp sponge to clean off the last bit of haze. If you don't wait for things to dry a bit you just pull up the grout from where you want it and spread it around the top of the tiles. No good.
So pretty right?
It took two days but only about 3 hours of actual labor. Lots of waiting. Don't rush it. I still think it is scary (how on earth will I manage a vertical surface- the grout is like pudding!?!?) but at least now I know it can be done. We are tackling the shower this weekend so I'll let you know how it goes!
Anyone else have grouting tips? This was my first experience with mixing my own grout and it is a lot more liquid than the pre-mixed stuff. Good for the floor but I'm curious to see how it works on the walls.
Cheers!
Materials
Tile- Black and White Basket Weave from The Tile Shop
Grout- Un-sanded grout from Home Depot in Charcoal
Wednesday, May 22, 2013
Tiling- The How and Why
Now I preface this by saying we are not master tilers nor is this necessarily the best way to go about things but this is the method that worked for us.
Because Daniel is a computer guy, we started with math.
Our shower wraps around three walls so we wanted our pattern to move smoothly from one side to another with the least amount of cuts (cutting tile is a pain). Math let us see exactly how many tiles we needed and how many part tiles we needed for our first row.
Then we pulled out our new best friend. The laser level.
This ensured that everything stayed straight and lined up. No drifting!
Then we started tiling.
Realistically you could have started here but it helped to have some plan of attack. I didn't get a picture but we actually started at the height of the shower ledge (about half way) and tiled down. That made us sure that the most visible section (the ledge) would be a full tile instead of a partial tile. You can see in the above picture the laser level showing the horizontal and vertical lines (in red). That saved us from so many "are you sure that's level?" and "that doesn't look straight to me" arguments. The level doesn't lie my friends.
Once we got the lower half of the wall figured out the rest of the pattern followed. It probably took 1-2 hours just to get that first row down between the math and the staring. On our first day we only finished the back half of the wall. Day two took us to the left half and that was basically the weekend. Last weekend went a bit smoother. By the end we had made it to 99%
Why didn't we finish? We ran out of edge tiles. I grabbed another case this week and we should be ready for grout by the weekend.
So there you have it. Our third tile laying experience. It was definitely a lot easier this time around but it still took a lot of patience and planning (things I have trouble with) and a lot of mortar. Like way more than I thought we would need.
Hopefully that helps those of you on the fence about a big tiling job with your decision. It isn't rocket science, but it can seem that way. Seeing how the quotes we got for someone else to do the job were around $1,700, my $500 tile job is perfect in my eyes.
Cheers!
Because Daniel is a computer guy, we started with math.
Our shower wraps around three walls so we wanted our pattern to move smoothly from one side to another with the least amount of cuts (cutting tile is a pain). Math let us see exactly how many tiles we needed and how many part tiles we needed for our first row.
Then we pulled out our new best friend. The laser level.
This ensured that everything stayed straight and lined up. No drifting!
Then we started tiling.
Realistically you could have started here but it helped to have some plan of attack. I didn't get a picture but we actually started at the height of the shower ledge (about half way) and tiled down. That made us sure that the most visible section (the ledge) would be a full tile instead of a partial tile. You can see in the above picture the laser level showing the horizontal and vertical lines (in red). That saved us from so many "are you sure that's level?" and "that doesn't look straight to me" arguments. The level doesn't lie my friends.
Once we got the lower half of the wall figured out the rest of the pattern followed. It probably took 1-2 hours just to get that first row down between the math and the staring. On our first day we only finished the back half of the wall. Day two took us to the left half and that was basically the weekend. Last weekend went a bit smoother. By the end we had made it to 99%
Why didn't we finish? We ran out of edge tiles. I grabbed another case this week and we should be ready for grout by the weekend.
So there you have it. Our third tile laying experience. It was definitely a lot easier this time around but it still took a lot of patience and planning (things I have trouble with) and a lot of mortar. Like way more than I thought we would need.
Hopefully that helps those of you on the fence about a big tiling job with your decision. It isn't rocket science, but it can seem that way. Seeing how the quotes we got for someone else to do the job were around $1,700, my $500 tile job is perfect in my eyes.
Cheers!
Thursday, January 17, 2013
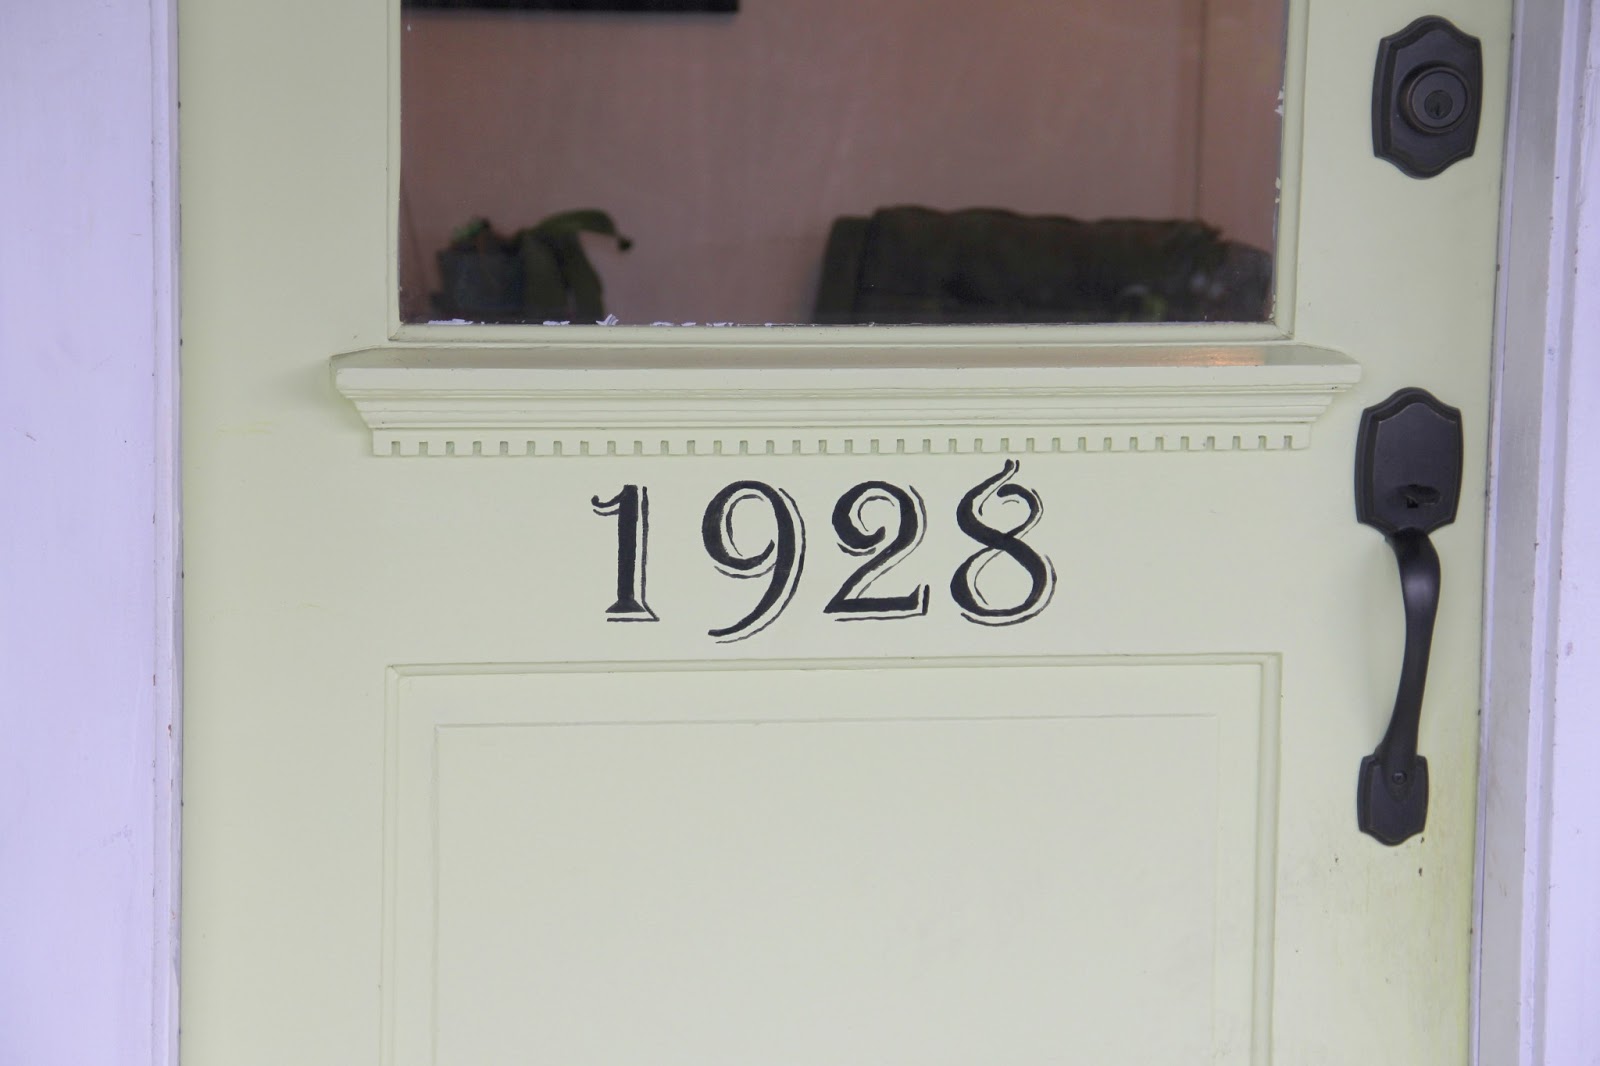
DIY House Numbers
I pinned this post about lettering wood months ago with no purpose in mind. So it sat there. Waiting for some inspiration. Then I got it! We need numbers on our front door! Ta-Da!
Before our recent tree removal finding the house was a bit of a pain. You could never really tell what the address was with all of the trees obscuring the view from the street. Now that it is open, I wanted to change that.
Jamie's tutorial was super easy to follow. Just print out what you want to letter and tape it to whatever you want.
I used Algerian font type at 400pts. The tracing was actually the hardest part. My door was not soft, nor smooth so my pencil skipped all over the place. Don't worry though, it is mostly a guide line of sorts. The whole project probably took me 2-3 hours and two coats of black paint.
Not the smoothest but I still like the over all look of the hand lettering.
Here's the door, unadorned.
And adorned.
The only downside? If I want to change the door color I'll have to repaint my numbers. Here's to hoping I don't get tired of my door any time soon.
Anyone else try there hand at hand lettering? Michelle over at Decor and the Dog made a super neat sign/ resolution reminder which I love!
Cheers!
Before our recent tree removal finding the house was a bit of a pain. You could never really tell what the address was with all of the trees obscuring the view from the street. Now that it is open, I wanted to change that.
Jamie's tutorial was super easy to follow. Just print out what you want to letter and tape it to whatever you want.
I used Algerian font type at 400pts. The tracing was actually the hardest part. My door was not soft, nor smooth so my pencil skipped all over the place. Don't worry though, it is mostly a guide line of sorts. The whole project probably took me 2-3 hours and two coats of black paint.
Not the smoothest but I still like the over all look of the hand lettering.
Here's the door, unadorned.
And adorned.
The only downside? If I want to change the door color I'll have to repaint my numbers. Here's to hoping I don't get tired of my door any time soon.
Anyone else try there hand at hand lettering? Michelle over at Decor and the Dog made a super neat sign/ resolution reminder which I love!
Cheers!
Friday, June 29, 2012
Jar Man
Like my subtle nod to Jamaican slang? Didn't get it? Yeah, that's how I felt most of the trip.
In grand tradition of honeymoons I wasted no time in collecting bits for our honeymoon jar. Daniel is very patient with me as I comb beaches for sticks and shells. I'm pretty excited with how this one turned out though.
For those of you who are unfamiliar with a memory jar I'll give you a quick run down (you can see last year's here). First, you start with a clean jar. Then you fill it with stuff. Since our honeymoon's center around beaches ours always include sand. Jamaica's sand is very interesting and textural. Lots of shell bits and coral.
Empty.
Full.
I had lot's of fun diving for urchin shells and coral bits. I also included one of the wrist bands from the resort to remember where we were.
Here's a nice close up of that sand. See how pretty it was.
In grand tradition of honeymoons I wasted no time in collecting bits for our honeymoon jar. Daniel is very patient with me as I comb beaches for sticks and shells. I'm pretty excited with how this one turned out though.
For those of you who are unfamiliar with a memory jar I'll give you a quick run down (you can see last year's here). First, you start with a clean jar. Then you fill it with stuff. Since our honeymoon's center around beaches ours always include sand. Jamaica's sand is very interesting and textural. Lots of shell bits and coral.
Empty.
Full.
I had lot's of fun diving for urchin shells and coral bits. I also included one of the wrist bands from the resort to remember where we were.
Here's a nice close up of that sand. See how pretty it was.
Nothing like a free souvenir right? I envision a whole wall of these someday to celebrate all of the years and travels we've had together.
What do you do to commemorate your vacations? Are you a scrapbooker? Or do you have something more unique?
Cheers!
Linking Up to
Friday, January 20, 2012
House of Cards
Well, house cards anyway. I was trolling my blog roll the other day and came across this post from The Design Pages about organized shopping. It's true, with everyone organizing every other aspect of their houses it is a good idea to organize how you buy for them. I certainly am in the same boat as Carol having frequently purchased furniture for the house only to get it home and realize it doesn't fit where I thought it would. Most often thrift store finds, which are sadly non returnable. I was really struck by one idea she had in particular. A pocket sized floor plan from Apartment Therapy.
And of course I thought "I can totally make that!" Little did I realize it would take all afternoon just to do the measurements. When I was finally done I got something that looked like this.
I did the same thing for each room noting measurements where I needed the short walls sizes for new furniture or paintings. I created them in publisher on 3X5 sized paper and printed them on card stock before laminating them.
This is the final result
I also clipped in paint swatches and fabric that I am using in some of the rooms to help with future color choices. I only laminated the front side so I can add measurements and info on the back. Now I only have to remember to bring it with me. It should come in handy with the kitchen remodel we are working on (if the snow ever goes away so that I can get more supplies!)
Are you always this organized? Or are you like me and leave your lists at home? Maybe you just have a good eye for proportion? Tell me your secrets.
Cheers!
Linking up to
Frugal Friday

![]() |
| Apartment Therapy |
And of course I thought "I can totally make that!" Little did I realize it would take all afternoon just to do the measurements. When I was finally done I got something that looked like this.
I did the same thing for each room noting measurements where I needed the short walls sizes for new furniture or paintings. I created them in publisher on 3X5 sized paper and printed them on card stock before laminating them.
This is the final result
I also clipped in paint swatches and fabric that I am using in some of the rooms to help with future color choices. I only laminated the front side so I can add measurements and info on the back. Now I only have to remember to bring it with me. It should come in handy with the kitchen remodel we are working on (if the snow ever goes away so that I can get more supplies!)
Are you always this organized? Or are you like me and leave your lists at home? Maybe you just have a good eye for proportion? Tell me your secrets.
Cheers!
Linking up to
Frugal Friday
Wednesday, October 26, 2011
Kitty Ghost Hunter
Since neither Michelle @ Ten June nor I got our next 30 day photo challenge done I thought I'd post this little fun tidbit. This weekend I found this little tutorial on 320* Sycamore for making these cool cheese cloth ghosts.

Then I draped them in the cheese cloth and sprayed with my spray starch.
Linking up to:
The Shabby Nest and
So I gathered my supplies and got going. I used paint cans to make the form and height and added a bowl and a ball of foil for the heads.
Then I draped them in the cheese cloth and sprayed with my spray starch.
Two coats and a day later I had these neat ghosts
I arranged them by the fire place and went downstairs to get some felt for the eyes. When I came back upstairs I was greeted with this amusing sight
She ain't afraid of no ghosts. And while my cute ghosts were ruined I can sleep safely at night knowing I have a kitty ghost hunter to keep me safe. It's a good thing we love our pets right?
Linking up to:
The Shabby Nest and
Thursday, October 20, 2011
Paint Stirrer Mirror
Not going to lie, I love Starburst mirrors. I think they are fun and elegant and make a nice show piece for a blank wall. I love the one in my living room but I had another mirror laying around after that project that needed a home. Where else to turn but Pinterest. I had seen this one by Centsational Girl a few months back but had totally forgotten about it. A few trips to the hardware store later I had my mirror.
It was easy to do and free (since I had the gold spray paint and mirror on hand). Centasional Girl's tutorial is great. I only differed in a few ways. I used spray paint instead of regular paint and I didn't trim the curved edges off of the paint sticks. I like the lighter amount of sticks I used also, her's is much more dense. It fits perfectly on the wall in the bathroom. The gold plays nicely with the brass fixtures of the tub and the mirror adds light. Got to love a quick and easy project!
Cheers!
It was easy to do and free (since I had the gold spray paint and mirror on hand). Centasional Girl's tutorial is great. I only differed in a few ways. I used spray paint instead of regular paint and I didn't trim the curved edges off of the paint sticks. I like the lighter amount of sticks I used also, her's is much more dense. It fits perfectly on the wall in the bathroom. The gold plays nicely with the brass fixtures of the tub and the mirror adds light. Got to love a quick and easy project!
Cheers!
Monday, October 17, 2011
Expandable Journal
Confession: I'm kind of a journal hoarder. I love them. I love to write, make lists, doodle and so many of them are just so pretty! But I hardly ever finish them. I have tons of half full journals laying around making great shelf decorations. The biggest problem I have is that I like to keep running lists but it would be nice to get rid of the pages I am done with. Then I saw this journal maker on another blog. So cute!

She has so many great journals that you can fill out and add pages too. I was trolling and then it hit me. I could totally make that! So I did.
Here it the process:
Step 1: Cut down two pieces of cardboard to the size you want your journal. I made them a little bigger than half a sheet of paper so that I could use scrap paper as pages. Then cut out fabric an inch larger than your cover size.
Step 2: Get your glue on. Cover one side with glue and then lay your fabric over it. Be sure to smooth the fabric out as you go so there are no wrinkles.
Step 3: Flip the cover over and glue down the overlap. I mitered my corners like so.
Step 4: Cut a piece of paper to be the inside cover and glue down
Repeat with the back and let dry over night weighted down by books to keep them flat. Text books work great.
Step 5: Drill holes for your binder rings. I actually used this step to create the holes through the whole journal. Paper and all. Just cut your pages to size and use binder clips to hold the whole thing together. 3/16" drill bit did the trick for me.
Step 6: Attach binder rings and enjoy!
I had a whole lot of colored paper left over from teaching so I made mine rainbow colored. It is also a great way to use up recycled scrap paper. As long as one side is blank you can go ahead.
It is great because I can move pages and add new ones as I go through them and it uses up all of the scrap material I have laying around. Great for blog ideas and lists. The cover is really sturdy and if I get bored with that I can make a new one! So great for anyone who likes to coordinate with the seasons.
Cheers!
Linking up to:
Frugal Friday
She has so many great journals that you can fill out and add pages too. I was trolling and then it hit me. I could totally make that! So I did.
Here it the process:
Step 1: Cut down two pieces of cardboard to the size you want your journal. I made them a little bigger than half a sheet of paper so that I could use scrap paper as pages. Then cut out fabric an inch larger than your cover size.
Step 2: Get your glue on. Cover one side with glue and then lay your fabric over it. Be sure to smooth the fabric out as you go so there are no wrinkles.
Step 3: Flip the cover over and glue down the overlap. I mitered my corners like so.
Step 4: Cut a piece of paper to be the inside cover and glue down
Repeat with the back and let dry over night weighted down by books to keep them flat. Text books work great.
Step 5: Drill holes for your binder rings. I actually used this step to create the holes through the whole journal. Paper and all. Just cut your pages to size and use binder clips to hold the whole thing together. 3/16" drill bit did the trick for me.
Step 6: Attach binder rings and enjoy!
I had a whole lot of colored paper left over from teaching so I made mine rainbow colored. It is also a great way to use up recycled scrap paper. As long as one side is blank you can go ahead.
It is great because I can move pages and add new ones as I go through them and it uses up all of the scrap material I have laying around. Great for blog ideas and lists. The cover is really sturdy and if I get bored with that I can make a new one! So great for anyone who likes to coordinate with the seasons.
Cheers!
Linking up to:
Frugal Friday
Subscribe to:
Posts (Atom)