
 |
| Re-posted here |
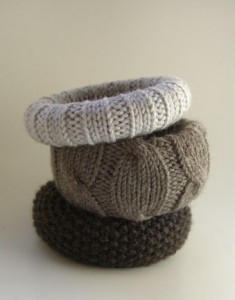
How cool are these? I totally know how to knit (one of my many mostly useless talents) so I thought to myself why not?? So here it is, attempt one. This is pretty easy if you know how to knit (and I'll get to a work around if you can't at the end).
Step 1: Cast on enough rounds to be twice the width of your tape roll. (I'd love to teach you all how to knit but I am seriously a novice at it so I suggest you find some you-tube videos. They will confuse you far less than I would).
Step 2: Knit away. If you know how to do anything fancy go for it! I just did a basic knit stitch the whole way.


Step 3: When you have knitted a band long enough to go around your cuff, stop and cast off. I did mine a little shorter so that the pattern would stretch a bit and look more interesting.
Step 4: Sew ends together.
Step 5: Slide over cuff and center.

Step 6: Hot glue that sucker down! Work slowly and carefully since the glue goes through the pattern but don't worry since this is the inside of the bracelet.
Step 7: Cover your seam with coordinating or contrasting ribbon. Contrasting is fun because you can add a pop of color to a neutral knit or if you'd rather it blend in go coordinating. This serves two functions: it covers your seam and makes it much less itchy to wear so go for a ribbon almost as wide as the bracelet.


Step 8: Enjoy! Knitting included it took me about 1-2 hours to do this project. If I didn't have to knit (or was faster at it) I would think you could finish in about 30 min. I passed the time watching HGTV and entertaining myself with Norman pictures.
If you can't knit you can easily replicate this by going to your local thrift store and buying some sweaters. I looked this weekend for some ones with neat texture and designs but they were all more than I wanted to spend on the project (I don't mind spending 10$ on a sweater I will be wearing but not one that I plan to cut up). The only step you would change would be step 4. Instead of sewing the ends together I would glue them and then cover the seam with a coordinating piece of ribbon to hide it. Crafty Farm Girl did a pretty good tutorial for all you non knitters out there but I think once you give it a whirl it will be easy. I'm still on the look out for some pretty neutral sweaters to chop up so I'll keep you posted when I complete a non knitted version for comparison.
Cheers!


Ok I must learn to knit! My goal is after christmas since I'm learning to sew right now 8) But Seriously so cute...
ReplyDelete...O AND Love the name of your blog..made me laugh because that's how I feel everyday ..bought our house a year ago
ReplyDeleteHow cute! Knitting is on my list of things to learn. I have to save this for then.
ReplyDeleteI had no idea Norman had his own blog!
This is adorable! I know just a basic chain, but I'm gonna try to make one for my sister...she would love this.
ReplyDeleteWould love it if you would link this up to our Rockin' link party going on now at RoCa and Company. Here is the link: http://rocaandcompany.blogspot.com/2011/10/you-rock-4-winner-of-silk-poppy-pin.html . Come and show off what you got. Hope to see you there...
Remember...YOU ROCK!!
Carmen @ RoCa and Company
www.rocaandcompany.blogspot.com
Pretty! Screams fall fashion!
ReplyDelete~ Meredith From A Mother Seeking Come find me on my blog, A Mother Seeking...